「DNSPOD」如何自行搭建DDNS
最近更新:2018/08/14 17:04 新增GoDNS
域名
DDNS最重要的就是域名,可以是收费也可以免费。
我们以免费为例;
http://www.dot.tk/zh/index.html(Free domains for all)
以hydrablog为例,那我们可以看到有五个免费域名可供我们注册,我选择了.cf,待会所需要的工具为DNSPOD。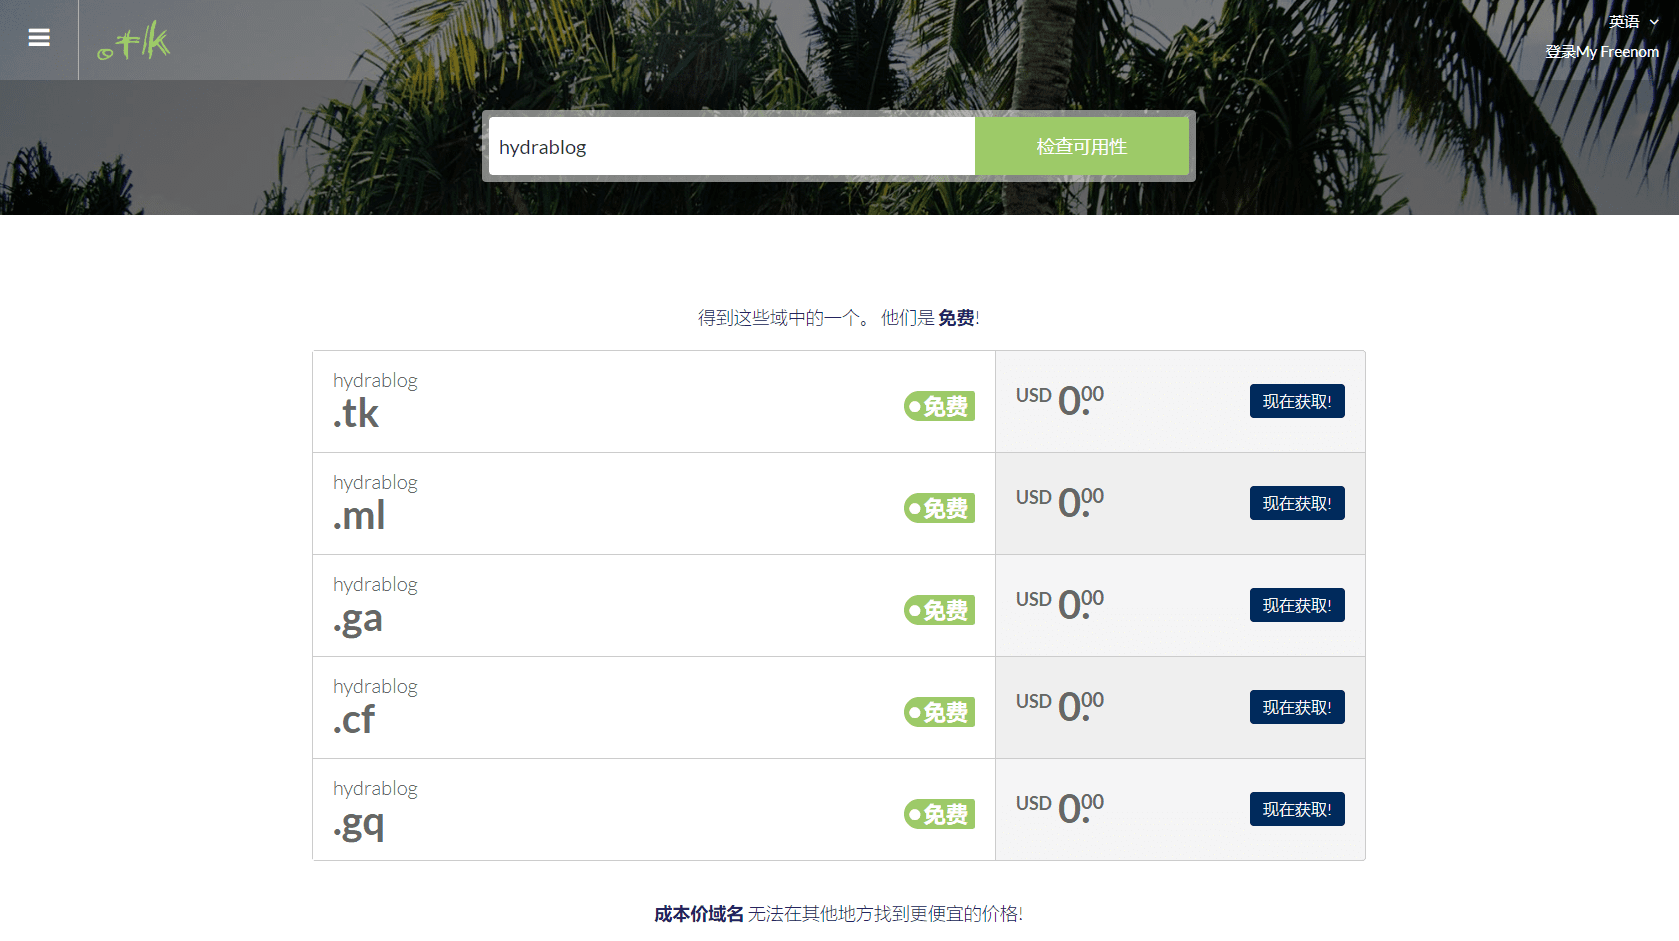
会跳转到Freenom的页面,我们选择12个月,并在DNS里随便填写一个IP以作备用。
跳转到下一页,注册或者登陆账号。
进入到域名管理页面,
修改DNS服务器为DNSPOD的。
DNSPOD设置
添加域名。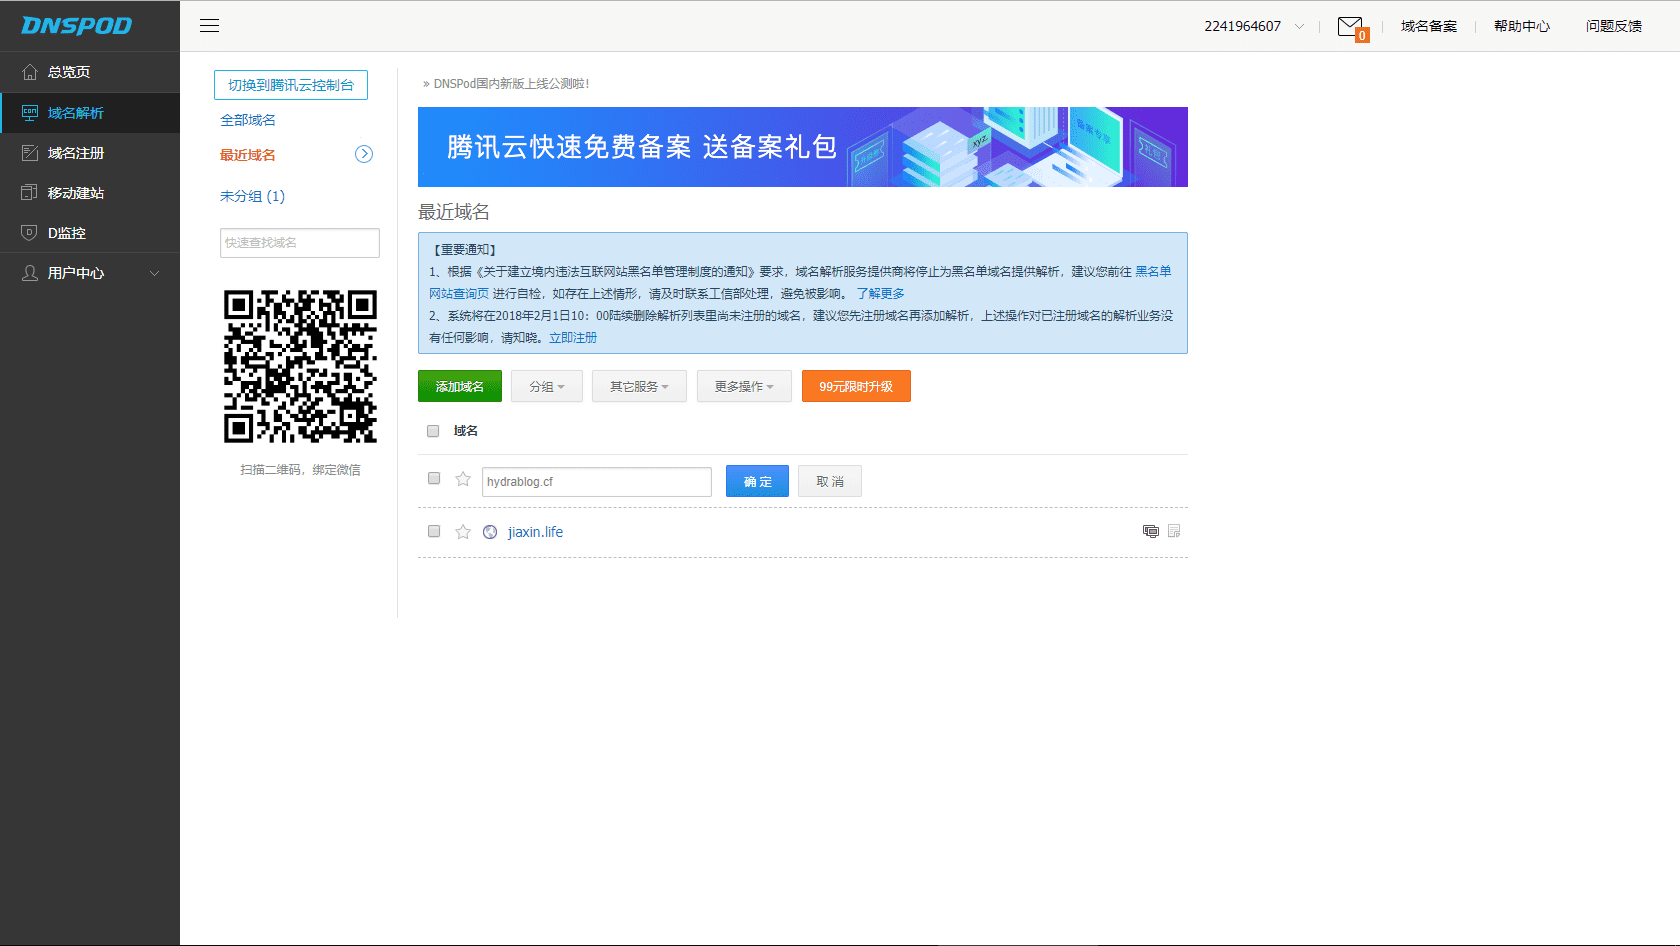
添加纪录,IP地址为你后台所提供的IP地址。
使用方法
ArDNSPod(Github项目地址)
基于DNSPod用户API实现的纯Shell动态域名客户端,适配网卡地址。
使用
复制dns.conf.example到同一目录下的dns.conf并根据你的配置修改即可。
执行时直接运行ddnspod.sh,支持cron任务。
配置文件格式:
# 安全起见,不推荐使用密码认证
# arMail="test@gmail.com"
# arPass="123"

# 推荐使用Token认证
# 按`TokenID,Token`格式填写
arToken="12345,7676f344eaeaea9074c123451234512d"

# 每行一个域名
arDdnsCheck "test.org" "subdomain"
作者:anrip
GoDNS
Github项目地址:https://github.com/timothyye/godns
git clone https://github.com/timothyye/godns.git
cd cmd/godns
go get -v
go build
$ ./godns -h
Usage of ./godns:
  -c string
        Specify a config file (default "./config.json")
  -d    Run it as docker mode
  -h    Show help
下载https://github.com/timothyye/godns/blob/master/config_sample.json
重命名为config.json
{
  "provider": "DNSPod",
  "email": "example@gmail.com",
  "password": "YourPassword",
  "login_token": "",
  "domains": [{
      "domain_name": "example.com",
      "sub_domains": ["www","test"]
    },{
      "domain_name": "example2.com",
      "sub_domains": ["www","test"]
    }
  ],
  "ip_url": "http://members.3322.org/dyndns/getip",
  "log_path": "./godns.log",
  "socks5_proxy": ""
}
最后运行nohup ./godns &
还有很多开启方法,具体参见GitHub项目
cron 定时任务
使用
*/15 * * * * curl -k -X POST https://dnsapi.cn/Record.Ddns -d 'login_email=登录邮箱&login_password=登录密码&format=json&domain_id=域名编号&record_id=记录编号&record_line=默认&sub_domain=子域名'
延伸教程
获取 login_token
DNSPOD > 用户中心 > 安全设置 > API Token
使用英文 , 将 ID 和 Token 连接起来即公共请求参数 login_token
获取 domain_id
curl ‘https://dnsapi.cn/Domain.List' -d ‘login_token=
根据响应中的 domains 得到域名对应的 domain_id
获取 record_id
curl ‘https://dnsapi.cn/Record.List' -d ‘login_token=
根据响应中的 records 得到子域名记录对应的 record_id
“record_line=默认” 无需修改
Ruby 实现方法(新手不推荐)
运行前,请确保你的机器已经配置了Ruby运行环境,关于如何安装Ruby,建议Google一下,这里推荐一篇靠谱的文章。
首先,你得从DNSPod的官网,登陆到你的域名管理界面,添加一个用来进行DDNS解析的A记录,比如你的域名是abc.com,想用bt.abc.com来做DDNS解析,那么就添加一个名为abc的A记录吧!
然后,是从GitHub上获取代码,你可以通过网页下载的方式,如果你已经装有git工具,可以直接clone一个下来:
git clone git://github.com/TimothyYe/DynDNS.git
下载完毕后,进入DynDNS目录,修改Config.rb Config.yaml文件:
# Defination of static strings

login_email : "abc@gmail.com"
login_password : "1234"

your_Domain : "abc.com"
your_SubDomain : "bt"
loginemail:是你的DNSPod帐号 loginpassword:是你的DNSPod登陆密码
yourDomain:是你的域名,比如上面提到的abc.com yourSubDomain:是你新添加那个A记录,比如上面提到的“bt”
修改完毕后,保存文件,直接用如下命令运行即可:
ruby DynDNS.rb start
脚本大致工作流程:脚本在后台运行,每5分钟,获取一次你的公网IP,如果发现与A记录解析的IP不一致,就更新A记录的IP。
运行后,可以ping你的二级域名,检查IP是否已经更新为你当前的公网IP。
另外,还可以在当前目录中生成的logger.txt中,查看程序运行日志!
到这里就搭建完成了,等待十分钟,将你的IP改为新的域名吧!
已授权给Nathosts使用此篇教程。